FILTERS


Tile Finish

Color

Tile Type

Factory Production

Tile Collections

Tile Size

Tile Area
Wooden tiles are a great alternative to regular hardwood floors since they are easy to clean, require minimal regular maintenance, are long-lasting and are easy on the pocket. With the advent of technology, wooden tiles are available in various hues and shades of various wood grains.
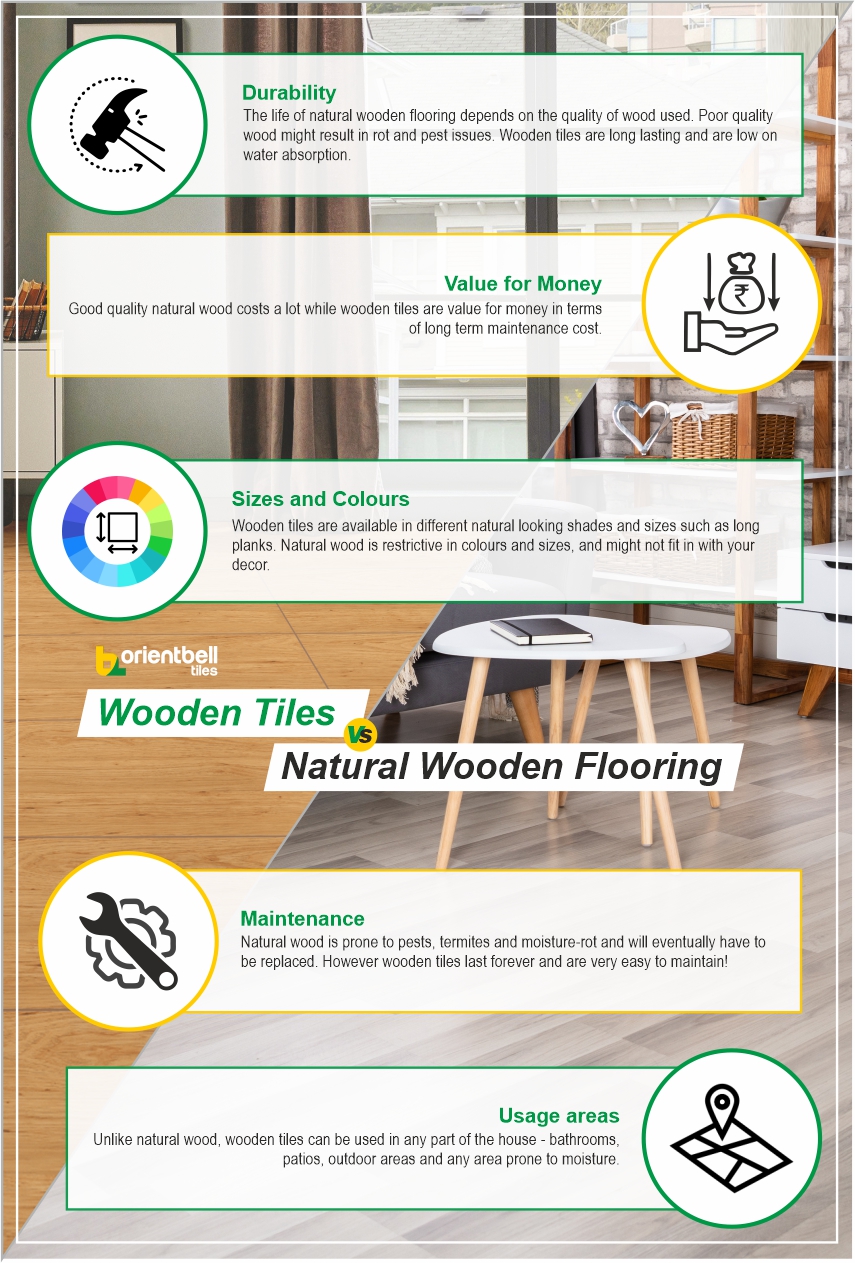
Wooden tiles are better for your space than wooden planks for a variety of reasons. Unlike wooden planks, wooden tiles do not require regular procedures such as sanding, polishing and sealing, reducing the amount of maintenance you need to carry out. Wooden tiles are also resistant to water, whereas wooden planks will bloat, rot or grow mould with regular exposure to water. This means that wooden tiles, unlike wooden planks, can not only be installed in the living room, bedroom, dining room, office, but also kitchen, bathroom, balcony, terrace, porch, etc.
Elevate your interiors with the natural elegance of wooden tile design. These tiles integrate the warmth of natural wood without the maintenance hassles. Our wood tile design offers unmatched durability and easy upkeep, perfect for any room. Explore our exquisite tile designs in wooden style and discover how effortlessly you can infuse charm into your living spaces while creating an atmosphere that exudes comfort and class.
Wooden tiles are a great alternative to regular hardwood floors since they are easy to clean, require minimal regular maintenance, are long-lasting and are easy on...
Items 1-25 of 248


While choosing wooden tiles for wall and floor, one should pay more attention to the different wood tile sizes to find the perfect size that best fits a particular space. The correct tile size not only leaves a perfect impression but also makes your room outstanding in appearance. Check out the list of wooden tile sizes that Orientbell Tiles has to offer.
Here are the sizes wooden tiles are available in.
|
Type |
Size in MM |
|
Small Size |
300x300mm 300x450mm 250x375mm |
|
Regular Size |
600x600mm 400x400mm 300x600mm 395x395mm |
|
Large Size |
600x1200mm |
|
Plank Tiles |
195x1200mm 145x600mm 300x1200mm |
Whether you're upgrading your living space or planning a new construction project, getting the right wood floor tile price is essential for achieving the look you want within your budget. Check out the wooden tiles' price ranges that cater to different budgets and design preferences, ensuring your floors maintain timeless charm and practicality.
|
Tile Type |
Minimum Price |
Maximum Price |
|
Wooden Tiles Price |
Rs. 42 per sq. feet |
Rs. 126 per sq. feet |
|
Wooden Floor Tiles Price |
Rs. 44 per sq. feet |
Rs. 126 per sq. feet |
|
Wooden Wall Tiles Price |
Rs. 42 per sq. feet |
Rs. 111 per sq. feet |
|
Wooden Floor Tiles 2x2 Price |
Rs. 85 per sq. feet |
Rs. 107 per sq. feet |
Unveil the diverse world of wooden tiles and find the perfect fit for your stylish space!
Ceramic Wooden Tiles: These are ceramic material tiles that mimic wood in its natural appearance, thereby providing one with a rustic aesthetic and budget-friendly solution for the interior space. Along with the availability of wooden paver tiles, they are also ideal for outdoor spaces. Overall, these tiles are suitable for residential and commercial applications with easy installation.
Vitrified Wooden Tiles: Two features that remain exclusively associated with vitrified wooden tiles are high durability and low maintenance. Prepared by vitrifying silica and clay at extreme temperatures, the resultant surface comes out to be hard and non-porous. These tiles are sturdy, give a real wood look without the fuss involved in its high maintenance.
Orientbell Tiles suggests endless creative ways to incorporate wooden tiles into every environment, enhancing the comforting feel of every area. Here are some spaces where you can use wooden tiles.
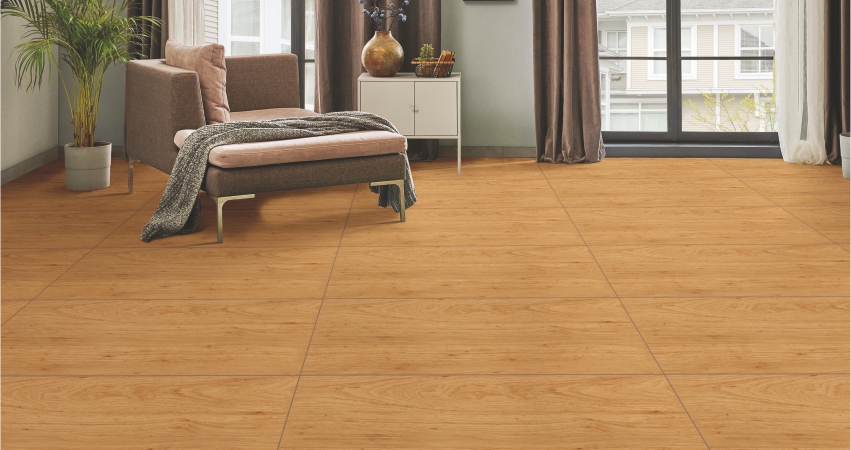
With its beautiful oak wood inspired design, the DGVT Venezia Oak Wood offers your space a striking look. This glazed vitrified tile is not only durable, but can also make your room appear a lot larger than it actually is thanks to its large dimension that reduces the need for more grout lines, offering you a seamless look.
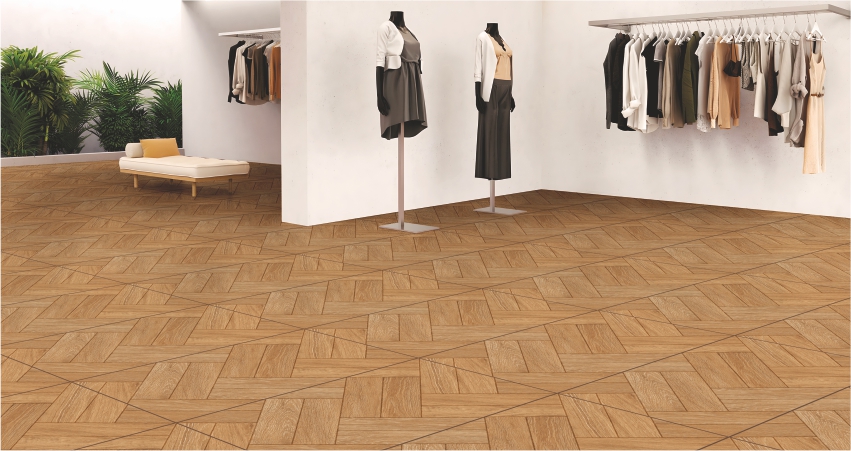
The distinctive double herringbone pattern of the DGVT Double Herringbone Oak Wood looks like natural hardwood at first, second and even third glance. This stunning glazed vitrified tile is a great choice for large spaces, especially spaces such as living rooms, malls, showrooms, etc. When you install large tiles, such as this one, you need less tiles to cover an area. This results in a lower number of grout tiles, not only resulting in a seamless unbroken look that makes your space appear bigger, but also reduces the number of time and effort required to clean the grout lines.
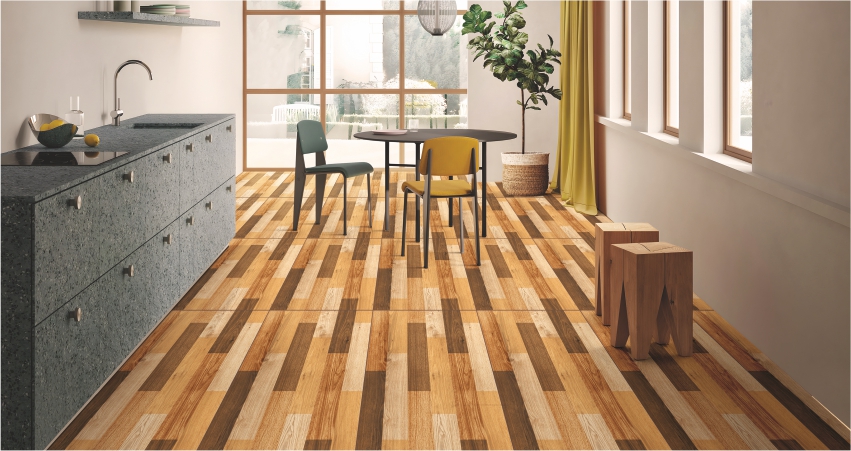
Bring home the look of natural wood with the DGVT Strips Oak Wood Multi. Its multi shade look adds a touch of rusticity to any space and works very well with the farmhouse style of design.
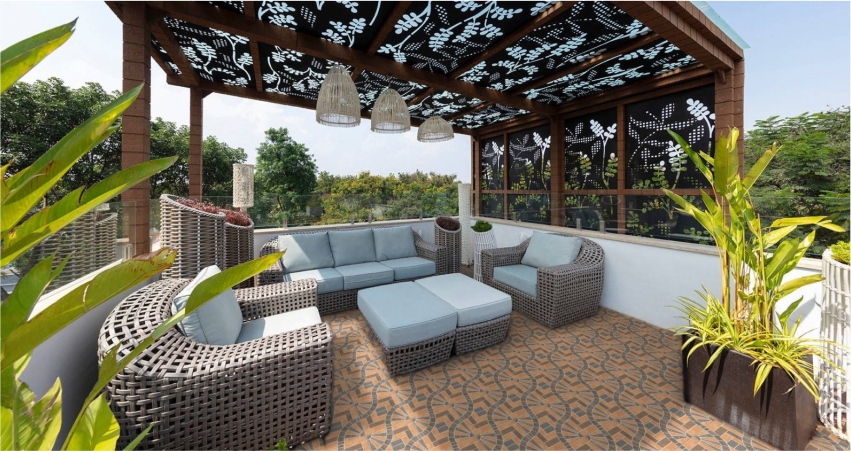
Hardwood and bathrooms are in general a strict no-no, but with wooden tiles for the bathroom you can easily bring the warmth of wood to your bathroom without worries of water damage. The DGVT Hickory Wood Brown can be used to add the warmth and visual depth that wood brings to the space.
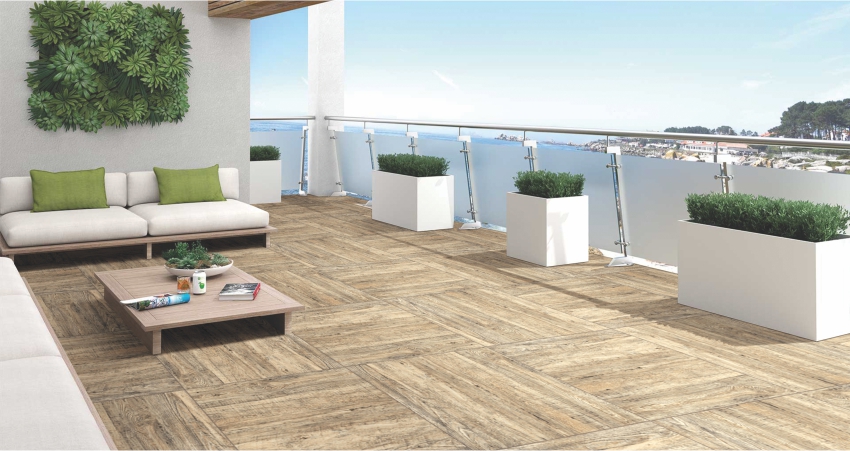
Your outdoor spaces, such as terraces and balconies, can highly benefit from wooden tiles. Wooden tiles for balcony, such as the DGVT Cypress Wood Ash, can withstand the onslaught of the elements while maintaining its pristine look and imparting a natural touch to your space.
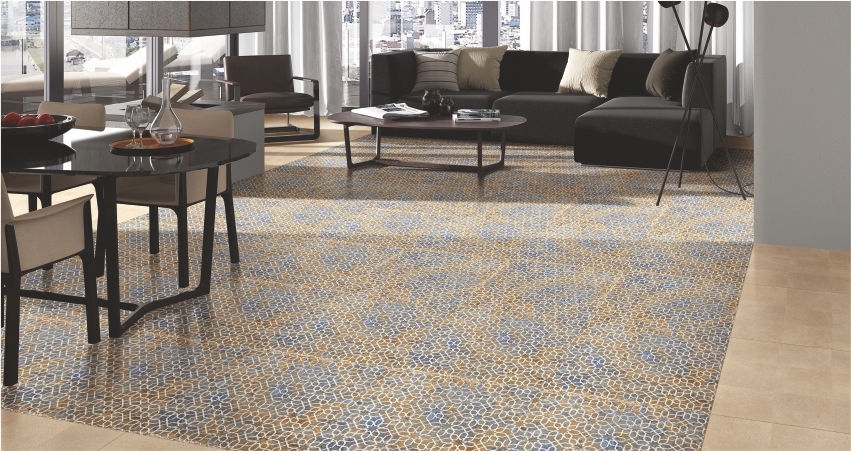
Give your pool deck a natural look with wooden tiles for swimming pool. The DGVT Poplar Wenge can work well outdoors and help create an inviting ambience.
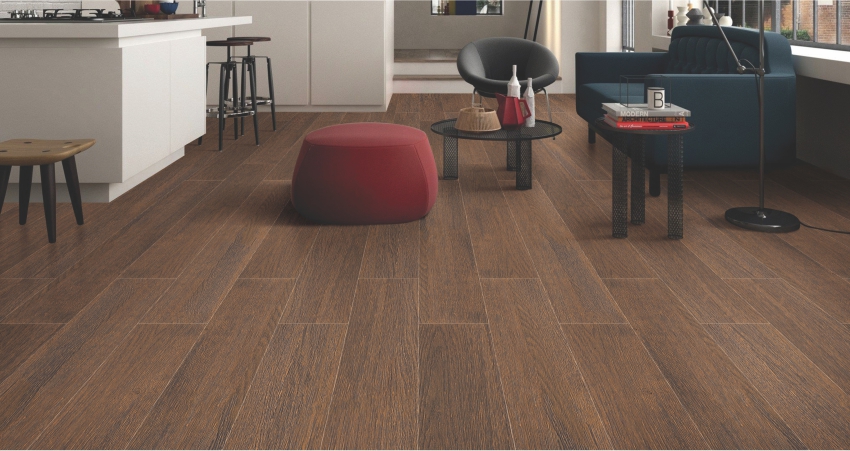
Wooden plank tile are a very popular choice among homeowners since they replicate the look of natural hardwood to perfection. With wooden planks like the Plank Wenge you can bring home the look of authentic hardwood at a fraction of the cost.
For the right kind of wooden flooring:
In the case of most tiles and hardwood flooring, wooden tiles cost a lot less than natural hardwood. It is not just the raw material (wooden tiles v/s wooden planks) that costs less, but the installation and the maintenance post installation is also a lot easier on the pocket when it comes to wooden tiles.
Click here to know more about wood finish tiles prices in comparison to hardwood flooring.
While wooden flooring can give your space a stunning look and even help boost the value of your property, it is undeniable that hardwood flooring comes with a long list of cons. Here are some of the disadvantages of using hardwood flooring:
1. Hardwood flooring is susceptible to damage from termites and requires regular inspection for the same.
2. Hardwood flooring is a lot more expensive than wooden tiles.
3. Hardwood flooring can be easily scratched and these scratches are very easily noticeable, making the floor look a lot older than it actually is. To get rid of scratches you will have to strip the finish off the floor and re-polish it often.
4. Hardwood flooring is prone to water damage and can expand or rot due to exposure to water.
5. Over a period of time hardwood floors tend to get squeaky and noisy.
6. Hardwood flooring requires regular maintenance in terms of sealing, polishing and refinishing. This not only requires time and effort, but also money, increasing the overall cost associated with the floor.
Laying wooden tiles is not that different from laying regular tiles. Here is how you lay wooden tiles:
Step 1: Level Your Floor
Use levelling tools to ensure that your subfloor is smooth and level and there aren’t any dips or peaks on your floor. These dips and peaks can make installing tiles difficult and can result in tile breakage too.
Step 2: Mix Up Your Mortar
Follow the package instructions to achieve the right consistency of mortar for better installation. If your consistency is off you will not achieve a strong bond.
Step 3: Figure Out The Orientation Of The Tile
If your tile has different faces, make sure you place the correct face, lest you may end up with a mismatched look. Tiles today come with an arrow mark at the back which makes it easier to distinguish the top from the bottom of the tile and ensure that all the tiles are placed the right way.
Step 4: Place The Tiles
A simple way to effectively place your tiles is to start placing them on the shorter end of the room, rather than the taller end.
Step 5: Use Tile Spacers
Add tile spacers between the tiles while laying, for a more uniform look.
Step 6: Grouting
Add grout to the joint and scrape off the excess. Once the grout has dried, clean off the extra grout from the surface of the tile using a scraper and a moist washcloth. With wooden tiles the grout join is very narrow, but it is a very important aspect of tile installation, since without the grout joint your tiles will not be able to adjust to the subtle movement of the subfloor. This can result in tile breakage, tile lippage and an uneven surface.
Want to know how to lay your wooden tiles in different patterns? Click here to learn more!
Orientbell Tiles’ visualisation tool, TriaLook, is designed to simplify the process of tile buying. With this tool you can visualise the tiles of your choice in your space before buying. Simply upload a picture of your space and select the tiles you wish to view. The tool will provide you with a realistic look of how the tiles will look post installation. TriaLook can be accessed from your computer or your mobile from the comfort of your home.